10 Days To Die
 Grading a feature in 3 days with Apple Color
Earlier this year I got a call from film producer and director Michael Sergi, the conversation went something like this……
“I have a 90min feature film shot on P2, it’s finished, edited and I want you to grade it, trouble is I don’t have much money ……Warren…… Warren…. are you still there?”
Of course I was still there, I enjoy working on movies so said I would take a look at the rough cut and see how much work was involved, then see if I could fit it into my schedule.
I was relieved to hear that Jason Hargraves had shot the film. I have worked with Jason on a number of projects over the previous 10 years so knew I would be working with good pictures.
The offline DVD looked good, a few colour balance fixes, the usual camera match issues but overall it looked a great base to work from. Michael had cut the film at Bond University on the Gold Coast, Australia. The original camera files were stored on the Bond machines so I decided that rather than grading at my place, the easiest and most connivent way to finish the film would be for me to plug my monitor and Wave control surface into the Bond Mac and use one of their editing rooms. Michael told me the budget he had for grading which worked out at 3 days, not ideal, but certainly possible. I had a good chat with Jason, he was very keen for me to get involved, so we locked in the dates.
 The film had been cut on Avid using the native AC Intra 100 files from the Panasonic P2 camera. Final Cut Pro does not work with these files so we exported the film into 2 x 45 minute sections as uncompressed QuickTime files. These could then be loaded into FCP and manually notched. The quickest way to do this is to load the EDL onto a second vision line and jump to the cut point on the EDL and use the razor tool to break the long 45 minute section into clips. Each clip is then an individual shot, so could be graded individually.
My “Wave” control surface is connected by USB to the MAC which means it is very easy to set up and carries my own personal settings. After just half an hour of set up work and checking the project in FCP we were ready to start work. The BON grading monitor was set to my calibrated REC 709 CRT emulation setting. The film was primarily being graded for Digital Cinema, TV and DVD release so we stayed in linear colour space.
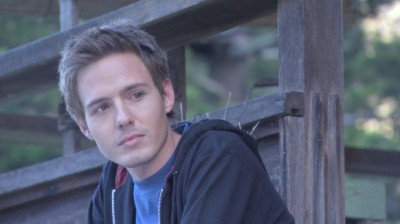
 Jason had limited time with me so I figured we could spend the first couple of hours exploring all the different colouring options for the film. I had watched the film a number of times so had a good idea what looks could work where. Jason and I traded opinions then jumped from scene to scene setting a “look” for the hero shot only. This mainly involved adding more contrast and generally warming the images to help tell the story. We also looked at a few problem shots from the movie. On a few occasions they had lost light on the shoot so leaving me with big colour temperature differences within a scene, that needed to be pulled back and graded to match the other shots. I was surprised how well the P2 images held up after such manipulation. By the end of the first day we had gone through the whole film and had all agreed on what grade worked best for each different location and time of day. When grading with limited time I always get the problem scenes out of the way first, they are the shots that have to be fixed and if you can get those looking good then the rest of the pictures will fall into place much easier.
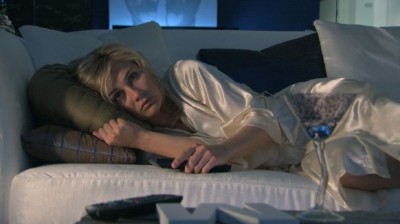
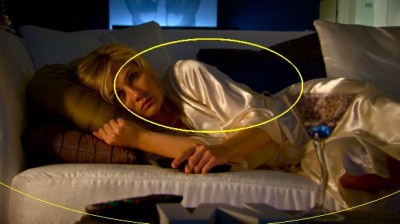
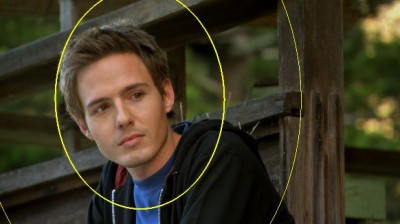
 The second day enabled me to start matching the shots surrounding the “hero” grade, I didn’t see any huge compression problems or artefacts when adding contrast or keying colours. Having done a base grade on the film I then concentrated on using windows and grads to isolate the key characters bringing them out of the background. A slight vignette darking the outside of the picture subtlety brings out the people in the foreground. A second window was then normally used to bring out the face or eyes of the character.
Jason and Michael had used a number of camera tracking shots, which meant I had to utilise the tracker in “Color” to track the window shape on to the walking actor. This works very well and saved lots of time over the manually marking keyframes to move a window shape.
Day 3 saw Michael, Jason and myself re visit the whole film adding little touches to help the overall look of the movie.
In a couple of places we changed our initial thinking on the best look for a scene. This is the advantage on having a number of days to grade a project, being able to go away and come back with fresh eyes can really help. My preference is always to take 2 shorter days rather than 1 long day when grading drama or documentaries.
Jason and I continued adding little grads and vignettes, we also used some dynamic grades to match the last shot of a scene into the first shot of the next scene.
At the end of the 3 days we were all very pleased with the results. “Ten ways to Die” is currently being mixed with the first preview screenings happening very soon.
“10 Days to Die”
Executive Producer Raoul Mortley
Produced by Michael Sergi
Supervising Director Michael Sergi
Co-Directors Casie Coddington, Elaine Niessner
DP jason hargraves
Colorist Warren Eagles


